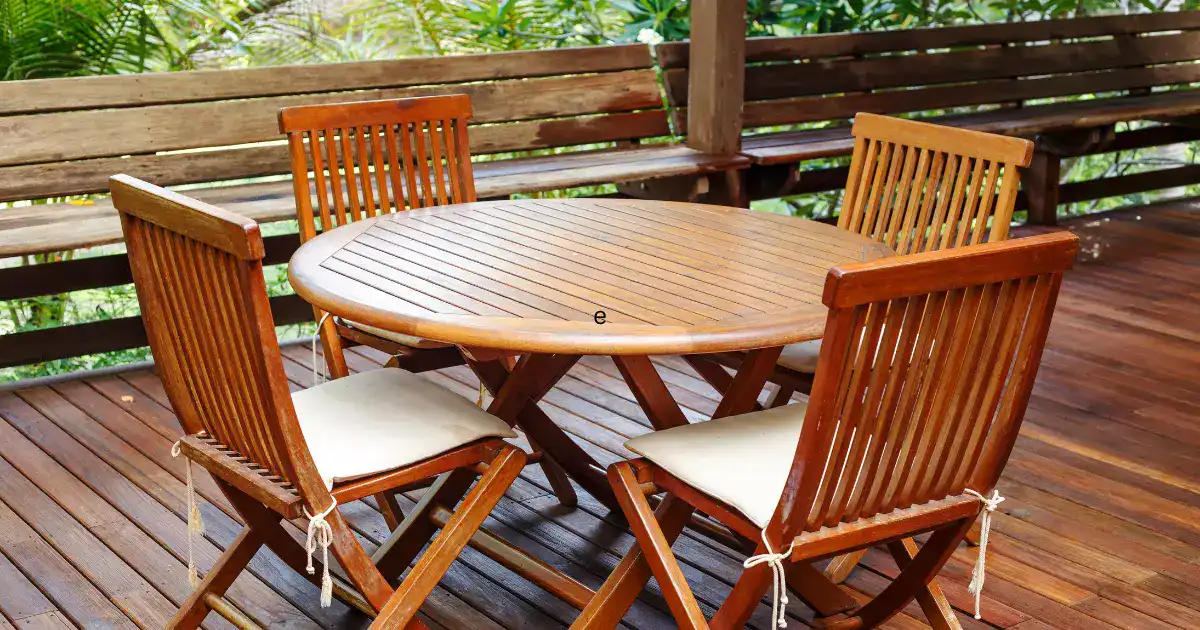
You know how your teak patio furniture has been looking a little worn out lately after all those years sitting outside? Well friends, don’t you worry – with a little TLC, we can freshen it right up!
Teak’s alternative name “the eternal wood” stems from its natural resilience against the elements. Teak is a sturdy old wood, but even the toughest of souls need some love after facing storm after storm. Years outdoors eventually leave a noticeable toll in the form of greyed and weathered wood. But restoring teak is both possible and rewarding, returning it to near-new condition. In this guide, I’ll show you everything about how to restore teak outdoor furniture.
We’ll discuss what causes teak to fade over time so, it makes sense. Then I’ll share all my favorite tricks for the job. Whether a simple oiling is all you need or a deeper clean, I have the steps so, you can’t go wrong.
By the end, you’ll feel like your furniture’s got a new lease on life. A few hours of elbow grease mean more sunny hangouts together down the line. So, round up your cleaners and oils, and let’s get to work on giving that tired teak the refresh it deserves! I just know you’ll be amazed at the transformation.
What Causes Teak to Fade?
To properly restore teak, first understand what contributes to its inevitable aging outdoors:
1. UV Damage from Sun Exposure
Teak is highly resilient to weather, but ultraviolet (UV) rays from sunlight can slowly break down the wood’s cell structure over extended periods. This photodamage causes the teak’s hue to visibly fade.
2. Moisture Absorption from Rain and Snow
While teak contains natural oils making it water-resistant, absorbing and releasing moisture daily takes a toll. This leads teak to crack, warp, or peel in severe weather climates.
3. Microbes
All sorts of tiny microbes like mold and mildew just love to nibble on the natural sugars in teak wood. Their feasting leaves behind stains all over the furniture.
4. Pollution
That dirty air we breathe is full of acid particles from cars, factories, etc. Over time, all that pollution slowly eats away at the teak’s outer layers. Just like it etches away at statues and buildings too. Then city bugs can really do a number on nice wood if it’s exposed to it all the time!
This natural weathering breakdown creates signs like cracks, darker/lighter patches, or small gaps in the grain. Knowing age factors lets you target restoration to each problem area. With the right treatment, teak regains its warm honey tone for many more seasons.
Signs it’s Time for Restoration

Several telltale signs indicate teak furniture needs revitalizing:
- Faded/Weathered Color – Teak loses its golden-brown luster, appearing dull or ashen.
- Cracked/Peeling Surface – Damage appears from moisture absorption/desorption cycles.
- Loss of Water Repellency – Water no longer beads up and absorbs into the grain instead.
- General Worn Appearance – Furniture looks tired and outdated from cumulative sun/weather damage.
Catching teak restoration early prevents further deterioration. But it can still restore older, heavily-weathered pieces to a revitalized state.
Gather Your Supplies

Before diving into this restoration project, you’ll want to make sure you have all your ducks in a row supply-wise. Having all your supplies ready to go before you start will definitely save you some headaches later on.
It pays to take a little time upfront to gather whatever you need. Doing some prep and getting organized with your supplies is key to keeping the job moving along smoothly. Do a once-over of the steps and jot down a list of what you’ll need
- Teak cleaner/brightener or mild dish soap for surfaces
- 150-220 grit sandpaper for smoothing
- Mineral spirits for dust removal
- Brushes for scrubbing and oiling
- Rags
- Teak sealer or oil suitable for exterior use
- Work gloves, dust mask
Once you have everything on hand and prepped to go, the actual restoration will be a breeze. Not having to stop and hunt around for missing supplies will let you get into a nice repair groove. So take a few minutes to round up your arsenal before tackling the furniture refresh – it will seriously pay off to be fully stocked and ready for action when you start restoring!
Prep Work Before Restoration
Before diving into restoration, properly prepping the surface sets you up for the best results:
- Remove Furniture: Carry inside or to a covered workspace for stripping/sanding dust control.
- Power Wash: Use low-pressure to remove dirt/mold without damage if needed, rinsing fully.
- Inspect Condition: Evaluate restoration depth based on weathering/staining present.
- Cover Surfaces: Protect other surfaces like wood decks from drips/splatter during work.
- Wear Proper Gear: Wear safety glasses, a respirator, or a ventilated space for dust/chemicals.
Executing a careful prep creates optimal conditions for deep-cleaning or refinishing teak successfully with minimal effort. Proper safety gear also prevents health issues down the line.
Restoring Weathered Teak – Basic Process

For moderately faded teak, a basic conditioning treatment works well. Alright folks, here’s the plan:
- Clean Thoroughly: Remove surface dirt and grime with a mixture of water and mild dish soap that’s safe for wood.
- Rinse Completely: Wipe or power wash away soap bubbles that could later attract dirt.
- Apply Conditioner: Choose an easy-to-use teak oil or cleansing cleaner/protectant product.
- Work Into Grain: Use a natural bristle brush to scrub the product’s overall vertical/horizontal surfaces.
- Wipe Away Excess: Use an absorbent cloth to buff off any pooled conditioner for a silky feel.
- Let It Dry: Whatever product you use, whether it’s an oil or cleaner, make sure to give it time to soak in before moving the furniture around again. Most stuff needs a full day, sometimes overnight, before it cures up all nice.
With regular conditioning, teak maintains a smooth appearance between more thorough restoration periods. This simple process revives it back to its reddish-brown tone.
Deep Restoration for Severely Weathered Teak

If your furniture has seen better days after years outdoors battling the sun, rain, and whatever else Mother Nature threw at it, the restoration process may require a bit more elbow grease on your part. But don’t be discouraged – with a little extra effort, you can bring those tired old pieces back to life.
For furniture that’s faded and worn down, I’d recommend going above and beyond with a few extra restoring techniques. The poor thing has been through the wringer, so you’ll want to invest some extra love and care into really revitalizing it. Don’t be afraid to roll up your sleeves and put in a little extra muscle – your furniture will surely appreciate the TLC. With the right care, even seriously faded pieces can be revived. I would recommend the following techniques:
- Light Sanding: Use 120-grit paper to scuff wood and remove the top grime layer evenly.
- Wipe Away Dust: Clean the sanded surface thoroughly so no particles remain.
- Apply Teak Cleaner: Pick a product containing oxalic acid to further cut through stains.
- Scrub Well: Work cleaner into the grain with a natural bristle brush, agitating covered areas.
- Rinse Completely: Flush the teak several times until rinsed solutions run clear.
- Allow to Dry: Let teak sit uncovered for a full 24-48 hours to ensure complete drying.
- Refinish: Apply multiple thin coats of teak oil or spar varnish for full protection and color.
Deeper restoration restores the teak’s full luster and protects it from future fading through a multistep specialized process. Be thorough in rinsing out chemicals after deep cleaning as well.
Ongoing Teak Maintenance
One last bit of wisdom before we wrap up.
Doing this restoration job once will get your teak looking finer than wine again. But you know what keeps it that way? Ongoing maintenance, that’s what.
A little TLC here and there is key to keeping your furniture looking as good as new season after season. I know maintaining stuff sounds boring sometimes. But trust me, it’ll save you from bigger projects down the line. Plus, your teak will always look its best! Following are some tips for ongoing maintenance:
- Routinely blow off or sweep loose debris throughout the season.
- Wipe up spills immediately to avoid long-term moisture damage.
- Reapply conditioner or sealant 1-2 times per year depending on wear.
- Lightly sand and refresh protective coating as needed, such as every 3-5 years.
- Inspect fasteners annually and tighten loose hardware preventing cracking.
- Store furnishings inside or under a waterproof cover during winter.
Teak’s charm lasts the longest when it’s protected right. And the best way to do that is through regular upkeep.
For sure, doing a full restoration will bring your furniture’s glow back in a big way. But maintaining it afterward is what locks in that restored beauty long term.
When you put in the work now with care and cleaning, your teak stays vibrant season after season. Restoring plus keeping up with TLC is the perfect pairing to preserve that rich patina.
You guys enjoyed this guide, yeah? I hope the tips help you bring your teak back to life and keep it feeling fine for years to come! With some diligent maintenance, its natural warmth can last forever.
Final Thoughts
You know, with a little TLC regularly, your teak just keeps looking better and better over the years.
These techniques we covered allow the wood’s good looks to last season after season. As long as you maintain it with some simple cleaning and oiling every so often, teak holds onto that gorgeous appearance.
And isn’t that something? Even after facing down all those storms Mother Nature throws at, teak’s natural durability comes through. With a periodic restoration to freshen it up, that innate strength just shines on through.
Before you know it, another season will roll around and your furniture will still be turning heads! I hope these tips come in handy for you all as you tackle your restoration projects. Apply some love to your teak regularly and I promise that natural beauty will endure for years and years to come.
FAQs About Restoring Teak Furniture
Q: What is the best way to clean teak furniture before restoring it?
For basic cleaning of dirt and stains, mix gentle dish soap with lukewarm water. Use a soft brush or rag to scrub, rinse, and let dry completely. For mold or mildew, add 1/3 bleach to a water solution and scrub affected areas before rinsing. Always spot-test cleaners first.
Q: Can I use any kind of sandpaper, or should I choose a specific type/grade?
For gentle smoothing and stripping away oxidation, #80-120 grit paper is suitable. Finer 150-220 grit helps achieve a silky texture. Only sand with the grain to avoid scratching. Wipe frequently during work.
Q: Is teak oil the best sealer choice, or are there alternatives?
Teak oils are highly effective but alternatives like teak cleaners and sealants are also good options that are easier to apply. Look for water-based, UV-resistant products labeled for exterior hardwood use. Reputable brands will protect against rot and future staining.
Q: How often should teak furniture be resealed after the initial restoration?
As a general guideline, reapply the sealant every 3-6 months, depending on your furniture’s exposure to elements. Furniture sitting in direct sun or rain will likely need sealing more frequently for maximum protection against discoloration and cracking.
Q: Can I use teak furniture immediately after sealing or does it need time to cure?
It’s best to allow new coats of sealer 24 hours to fully cure before exposing the teak to moisture, especially from food/drink spills or heavy rain. This ensures the protective barrier is completely formed. Curing times may vary by product.
Q: Will sealing teak change its natural color and appearance?
A light natural color change is normal as sealers penetrate deep into the wood grain. But the finish should accentuate the teak’s golden tones, not drastically darken it. Take time to ensure thorough coverage but avoid excessive sealer application.
Q: What’s the best way to remove tannin stains or water marks from restored teak?
For light tannin stains, try wiping the area with mineral spirits or denatured alcohol on a cloth. Stubborn watermarks may require lightly sanding and resealing just that spot. Prevent future stains by covering or storing the furniture indoors when not in use.
Q: How can I freshen up sealed teak between full restorations?
Simply wash with a mild soap and water solution and scrub lightly with a stiff brush to remove surface dirt. Rinsing and thorough drying are key. Occasional applications of teak cleaner/brightener can also help maintain the sealed teak’s patina without intensive re-sanding or re-sealing.
Q: What should I do if mold/mildew appears on the restored teak?
Scrub the area with a diluted bleach solution (1/3 bleach, 2/3 water) and let dry fully before re-sealing just that localized area. Prevention is key – storage location and overhangs should allow for airflow and drying. Mildew may require restarting the full restoration process if severe.
Q: Is it difficult to restore teak furniture with intricate carvings or designs?
Restoring detailed teak requires extra care and potentially smaller sandpaper/brushes to reach all areas. Go slowly, rinse frequently when cleaning, and reseal piece-by-piece as needed, checking for even coverage in crevices. The results will be worth the effort to revive heirloom quality furniture.